Tuesday, January 22, 2013

T-Shirt Blanket Tutorial PART I

If you're like us, you might have the trash bag, drawer or closet full of old t-shirts you don't want to part with. Some of them are sentimental, some of them are funny...whatever your reason for not wanting to part with them, the fact of the matter is you probably aren't wearing these shirts anymore. So what to do with the pile of unworn t-shirts? 
T-Shirt Blanket!!!

What You'll Need:
30 (or more*) T-Shirts
1 Set of Queen-Sized bed sheets
1 piece of cardboard/foam board/card stock (at least 11x11)
1 dark colored sharpie
Dress maker's shears
Sewing pins
A ruler
A sewing machine OR serger

*Do not make your quilt larger than 6 squares wide, or 7 squares long. Anything larger than this will require King or California King sized bed sheets!

STEP ONE:
Make your quilt square pattern!
Using your cardboard, foam board or card stock, trace out a perfect 11x11 square using the sharpie. I've found that 11x11 inches is the perfect size for this job, but if you would like to give yourself more wiggle room you can make it bigger. You may want to measure the width and height of your SMALLEST t-shirt to make sure there is enough fabric, and also measure the width and height of the largest t-shirt GRAPHIC to make sure you won't be cutting off anything (if that sort of thing bothers you).


STEP TWO:
Trace your pattern onto all of your shirts! 
Use a sharpie, and there is really no need to be perfect. Just trace that square onto every shirt you want to use! Make sure to center everything, making sure you aren't cutting off pieces of the graphic....


Sometimes you might have to get creative with your pattern placement...the 11x11 rule works MOST of the time! 


For those dark-colored shirts you want to use, never fear... BLACK sharpie tends to show up just enough for your to be able to see the line and cut it! If you are having trouble seeing the line on dark fabrics, try using white chalk.

STEP THREE:
Cut those squares out! 
Using the dress maker's shears, cut out all of your blanket squares. Dress maker's shears make this process much faster and much neater. Most t-shirts are made our of a material called jersey, also known as the words most annoying fabric to cut. You can try to use regular scissors for this job, but be warned that scissors that are often used on paper may be too dull to cut this material!
Cut right along the sharpie line you made...


And ta-da!! You have a jersey square ready to become part of a beautiful new blanket!


STEP FOUR:
Organize your squares
Once you have all 30 of your shirts cut into squares, lay them all out on the floor to see what you've got. Maybe you want to put all of those concert t-shirts in chronological order, or maybe you want to make a rainbow! Whatever the method, now is the time to lay our your squares in their ultimate configuration. Lay them out 5 t-shirts wide, and 6 t-shirts long.
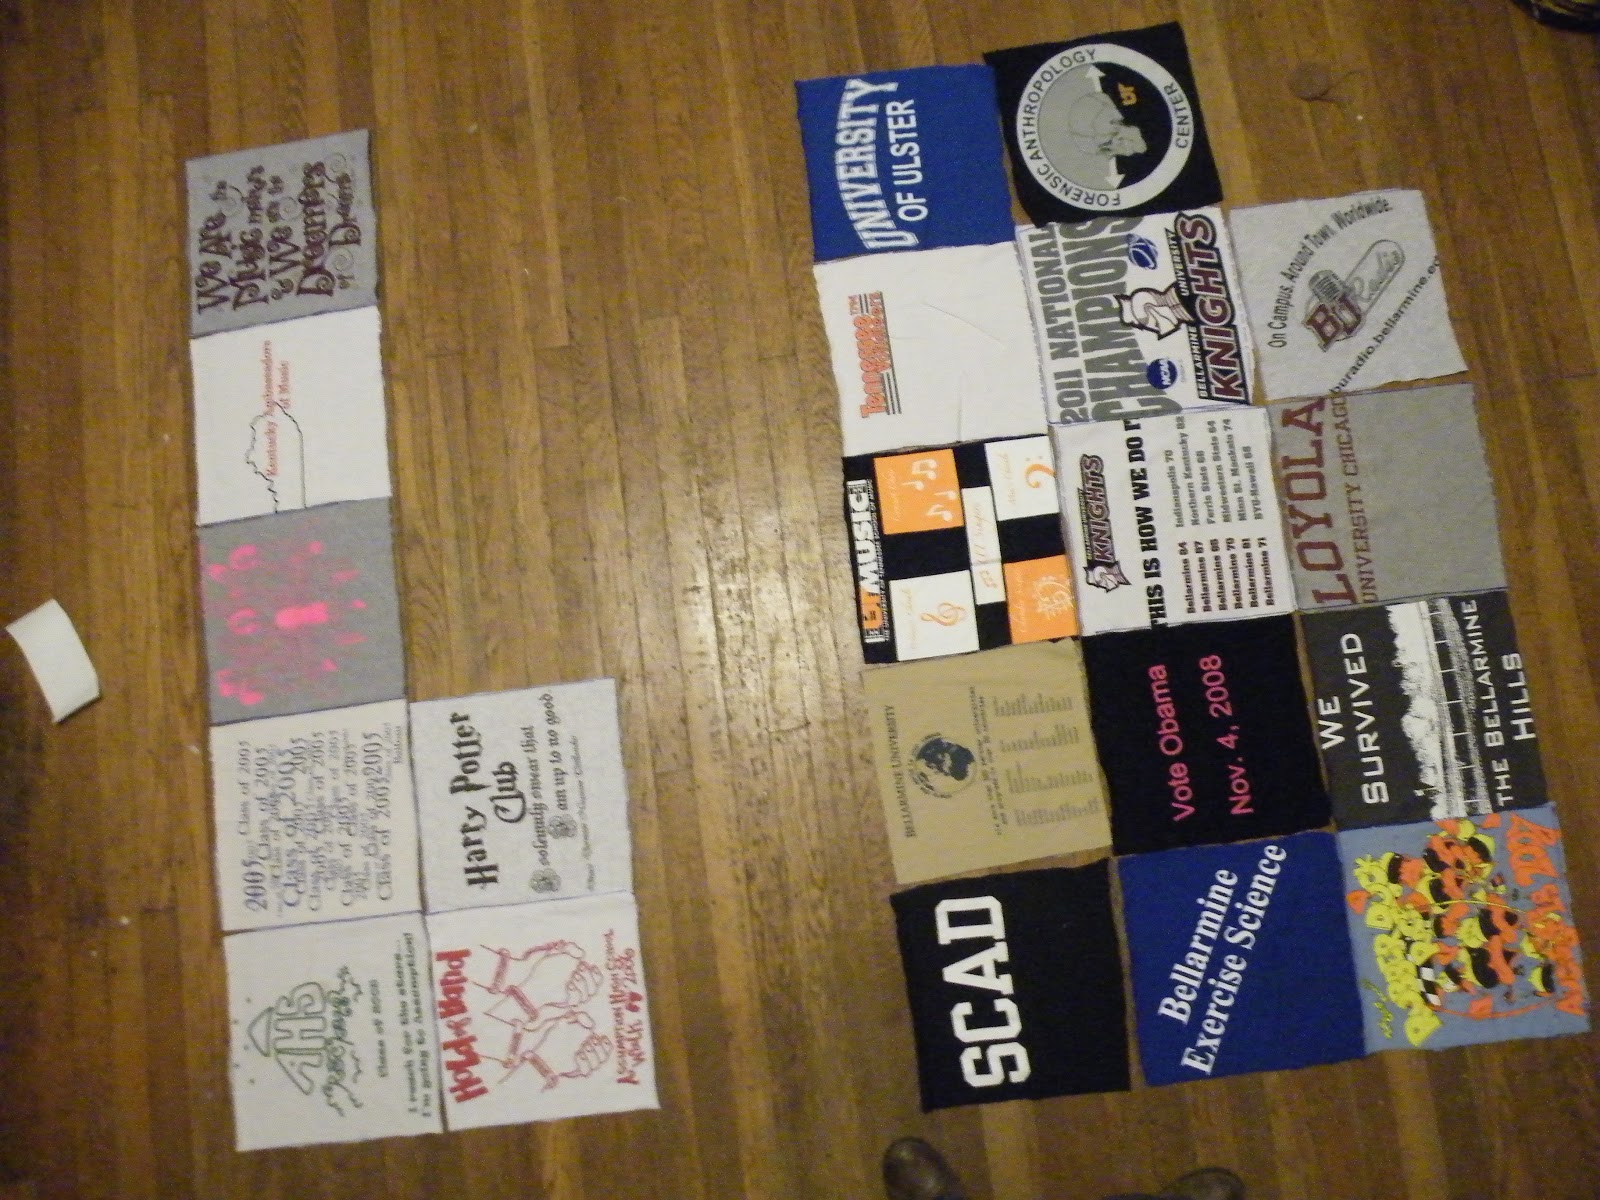
As you can see, when I was starting out I was short a few t-shirts...However, this helped me to form a good idea for a "theme" for this blanket! Geeze, we got a lot of t-shirts from our school days...
Once I scrounged up enough t-shirts it was time for.......

STEP FIVE:
Sew six rows of five

Something to remember about ANY sewing project is that when you are sewing two pieces together, you ALWAYS want the "right sides" facing each other. The "right side" is simply the side of the fabric you want to have showing. 
With these blankets, I like to sew the rows together first, from left to right. 
Here, I sewed the first two squares together already. I want to add the third, and of course, all subsequent squares! Hmmmm.... 

Take the next square in line and flip it upside down. The place it directly on top of the square you want to sew it to. 

Next, stitch along the right side of the squares.


Open this up and...TA-DA!!


REPEAT REPEAT REPEAT until you have six rows of five! 

STEP SIX:
Sew your six rows together!

At this point, if you are using a regular sewing machine, you will need to cut off the excess fabric. Follow the link and trim according to cut #1.
REMEMBER: Right sides together! I like to sew the rows together from bottom to top. Flip the row above the bottom row down onto the bottom row. This time, you may need to pin the side you want to sew together (the top edge shown here). When pinning, be sure that the pointy end of the pins AREN'T pointing OUT. This will ensure that you won't stick yourself and also will be easier to pull the pins out while you are sewing!


Once you have these two rows sewn together, when you open it up it should look like this!


Once you get ALL the squares sewn together it should look like one big block of t-shirts, like SO:

Once again, trim off the excess fabric from the back of your quilt front if you are using a regular sewing machine.

*If you are finished with all of these steps, please proceed to T-Shirt Blanket Tutorial PART II!!*

Part II is on its way! In the mean time, go gather all the t-shirts you can find and GET SEWING! 

Happy Sewing!
a.A

Saturday, December 15, 2012

How To Thread A Serger

Serger's are fantastic machines. You can sew AND cut off the extra fabric at the same time?! Not to mention, you get a lovely finished edge. It cuts sewing time in half and can make you look like one heck of a pro even if you are just a beginning sewer...However...They are also horrifyingly complicated when you have a look inside.

YIKES! That's a lot of moving parts...But it is very important to get familiar with all these moving parts and to understand what they do before you ever sew a scrap of fabric. 
Often, people sewing on a serger will find themselves asking...
Why is my serger coming un-threaded?
Why is the thread breaking?
Have I broken my serger??
Why doesn't my serger work?! AHHH!!

The solution to 99.9% of these questions: Threading.

Before you run off to a sewing machine repair shop and fork over $100+ dollars because you think you've broken your machine, make sure that the machine has been threaded properly. The first place to look might be inside the machine itself. On this Babylock, the instructions on how to thread it are right inside the door:

If you don't have something like this, I suggest having a look in your user manual. If you don't have a user manual, then search Google using your machine's make and model. Just about every machine's user's manual can be found on the interwebs these days!

HOWEVER, even WITH the user's manual...things can go all sorts of wrong. Every threading tutorial I have ever read, including the one in my manual, seems to leave out some all-powerful step...until now.
Your user's manual can get you at least through half of the steps. Here are the basics from my machine (with the all-powerful tips included), and from what I can tell, these are pretty basic steps for all sergers:

1. Move the upper knife out of your way

It's big. It's sharp. It's in your way. All serger's have a method that allows you to swing the knife up. Mine has a small lever that allows you to gently push it to the right, and a knob that allows you to twist it up. Yay! 

2. Thread the UPPER LOOPER
In this picture, the upper looper is outlined in yellow. Thread this looper by following your machine's guides. Be sure to lace the eye at the very tip of the looper from front to back. IMPORTANT: Your thread at this point may be crossing IN FRONT OF the lower looper (shown here in red). Make sure you gently move this thread BEHIND the lower looper!

3. Thread the LOWER LOOPER
Shown in the above picture in red, again follow your machine's guides. Once again, be sure the thread is laced through the eye from front to back. IMPORTANT: You IN NO WAY want the thread of the upper looper and the thread of the lower looper to tangle together. Remember that thread from the upper looper that you may have gently moved behind the lower looper?  Do not let the thread from the LOWER LOOPER be ABOVE this thread. You need to be able to hold both strands from the fully threaded loopers out to the left side of the machine...and they should in no way cross, touch or tangle.

4. Thread your Needles LAST! ALWAYS!
It sounds really silly, that something as simple as threading the needles last (always) could be the source of all of your problems...but in reality...it really could be. Even if one of the loopers' thread breaks or runs out, you MUST unthread the needles, and START THE ENTIRE THREADING PROCESS OVER AGAIN FROM THE BEGINNING. This is frustrating. This is time consuming. But it is what you must do.
Follow your machine's guides on how to thread these needles (going front to back through the needle eyes). Once again, these should not cross, touch or tangle with any other thread when held out to the left side of the machine.

5. Hand Crank Your Machine
Hand cranking will allow you to not only see your machine's working parts in action, but it will also give the machine a nice, slow start to its chaining process. Gently hold all four threads out to the left side of the machine with your left hand , and slowly crank the knob with your right hand. Do this until you have at least 2 inches of a chain. If it is chaining correctly...CONGRATULATIONS! You have just successfully threaded your machine! If it isn't chaining.......

A few common checks you can make are...
1. Is the top looper going up and catching on the right needle? If not, try lowering the right needle ever so slightly.
2. If the loopers don't seem to be moving as much as they should be, trying oiling your machine! 
3. If the threads are breaking or coming up-threaded, ensure you followed the threading instructions PERFECTLY, and also check your thread tention. 

6. Lower you Upper Knife, and test your machine with scrap fabric.

Testing your machine is always very important...you never want to ruin your actual project by....oh I dunno... accidentally leaving the upper knife in its up position, and ending up with a huge wad of fabric under the presser foot. (#AdmittingYourOwnFaults)


But that's all folks. I hope I have saved you a little bit of serger drama with this tutorial! I will leave you with one more handy piece of info!
So threading a serger is a pain, right?? RIGHT?? And you probably don't want to re-thread it every time you need a new color thread...RIGHT?? Well here's the trick...
Cut every single thread right above the spools. This will leave a piece of thread in-tact, following all of the guides, knooks and crannies you have worked so hard to lace it through. Go ahead and completely remove the needle threads (remember how you have to do these last? always? Unfortunately, this method also doesn't work for the needles, as a small knot in the thread will not pass through the eyes of the needles). Switch out your spools, and tie the ends of the new spools to the tails of the cut threads running through the machine to the lower and upper loopers. Make sure it is securely tied and pull the ends of the threads, effectively pulling the new thread all the way through the machine without the hassle of doing it all again by hand. The only thing left to do is lace the new thread through the guides for the needles, and hand-crank to make sure you did it all correctly! 

HAPPY SERGING!! 

artful.Anthropology

Tuesday, October 23, 2012

Update and Basket o' Babies

Good Afternoon Friends!

It has been a while since we have blogged.  In September we managed to have three successful yard sales and are currently selling our remaining stock at low prices.  Check out or Facebook page to see the items, they make great stocking stuffers!

At the moment we are playing with new concepts and developing new items for you!  We are also taking suggestions of what items you might want to see in the future, our zeppelins for example will be back by popular demand.

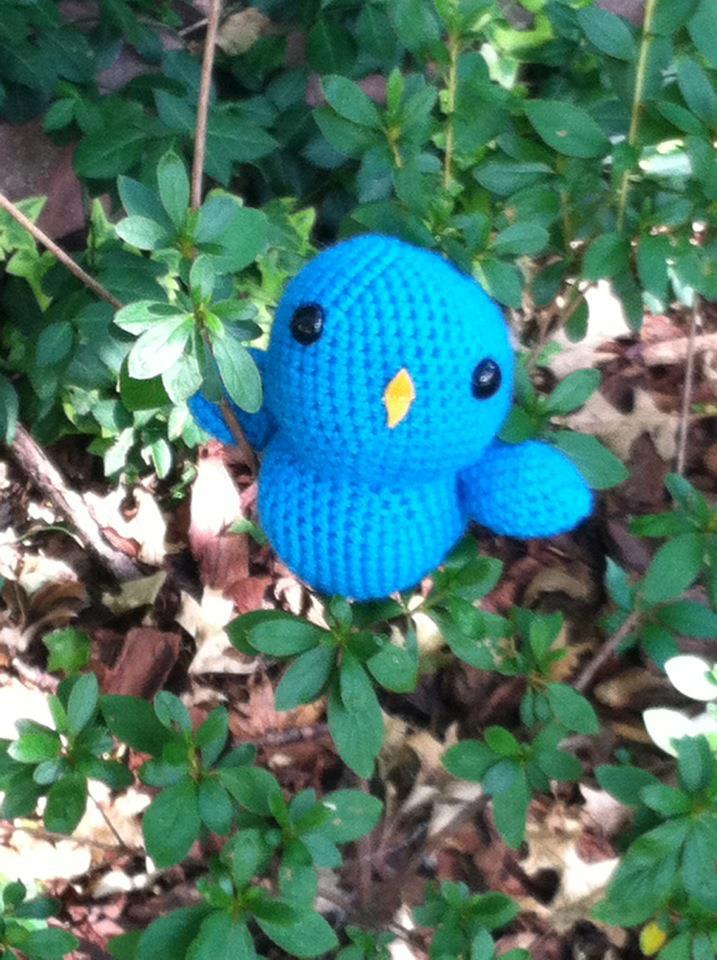
Our sweet bluebird hangs
 out in the forest
On a softer note, we have created a unique basket of gifts perfect for baby showers.  Our Basket o' Babies. You may choose six amigurumi animals to be placed in your basket in a variety of colors.  We are currently compiling a list of animals to be posted.  We can create an animal from any color found in Red Heart, Lion Brand Wool-ease or Vanna's Choice yarns.  Just take a look at what we've done so far!
Bluebird's friend Squirrel
is stopping to
admire the coleus
...and maybe take a nibble


Is that a kitteh stalking our woodland friends?


Looks like we have
a fish out of water!


The Pink Pony looks like
she's enjoying a graze
The penguin relaxes
against an icicle on his 'berg


While the snake visits,
whoa that must be cold!

And Octi is hiding in
 the shade

 These are just a few of our babies for Babies.  Don't forget to check out or Facebook page and message us if you are interested.

Cheers,
artful.Anthropology

Coming Soon

-Comprehensive list of amigurumi animals
-Our Komen Walk Bake Sale

Monday, July 9, 2012

Hot and Muggy

Good Afternoon!

It has been one hot summer! We had a lot of fun at the Sky Pirate ice cream social despite it being rained out by a massive thunderstorm only an hour into it. We must admit, the rain was a welcoming break in the heat and our garden really enjoyed the drink, especially the sunflower.

Wide Awake and Thirsty!

Our moonflowers have finally bloomed, (sorry no images they're hard to get at twilight) these and the morning glories have taken over the front of our house and they're growing so fast I have to cut them every other day to keep them from eating the porch! 

In other news, we're gearing up for cooler weather with gloves and other crochet items. Mainly experimenting with new patterns and seeing what yarns work with certain techniques. We've also kept our sewing machine whirring with dresses, aprons and super suits, yes, I said super suits.

The summer seems to be slipping by faster than ever this year! Check out our Facebook gallery for images of some of our wares, many are currently on sale! Just message us or email with any questions or orders!

Stay cool this July!

Cheers,

ArtfulAnthropology

Wednesday, June 13, 2012

Skirts!

Hello, everyone!

Today we are showcasing some of the skirts we have made - some more complicated than others. Lets start off with....

The Patchwork Circle

Created by using over 200 patches of fabric, this skirt is beautiful and vibrant! A great project to do when confounded with what to do with all of your scrap fabric. Cool in the summer and a literal blanket in the winter, you can don this skirt all year long! They can easily be made at any length.


The Gathered Skirt

Made with "gathering strings" sewn directly into the under part of the skirt, you can tie it up in the front, all the way around, or any way you like! Accented in the back with a corset tie.


The Upcycled Skirt

The number of things that one can accomplish with some old T-shirts never ends. This is just one of the many T-Shirt related projects we've done (One was already posted here - Check out our T-Shirt Quilt from a while back!). Simple, and to the point. It's a Beatles A-line Skirt.


There are more clothes and accessories on the horizon, and I suspect a few dolls too!

Upcoming Events

- The Kentucky Renaissance Fair is hosting a STEAMPUNK WEEKEND! You know where to come for your accessory and costume needs, right??
- The Sky Pirate Ice Cream Social has been moved to July 1st. We will be there selling and trading our wares, and having ice cream, of course!

Cheers!!
artful.Anthropology

Friday, June 1, 2012

Knitting and Concerts

Hello world!

CRAFTS----------


We come to you today to display yet another of our many talents. We like to consider ourselves a Jack of All Trades, so here we have a lovely feature on our knitting skillz! 


A great little bag that goes with any outfit!

The flowers are removeable, and can be
 used in your hair or on your dress!
These bags are made with cane handles and a very soft yarn. And YES, it will hold a lot more than you think! It's pack-rat tested!

FUN! ---------

We also enjoyed our Memorial Day weekend down at Louisville's Belvedere! Abbey Road on the River features some amazing musicians. Here are some pictures we captured! Click on the pictures to view the full gallery! 


Until next time - stay cool in this heat! Here comes summer!
<3 <3
artful.Anthropology

Friday, May 11, 2012

...et maintenant les fleurs

Spring is in full swing here in Louisville and our tiny little garden is finally growing like crazy! Last year we didn't do so well, we inherited the garden and now we know we are no farmers. I had one measly tomato and a pepper bush that grew like wildfire but no one to give jalapeƱos to. The herbs died and the few flowers we inherited were annuals.  However this season we went crazy overboard with the flowers and plants. The only thing we're having trouble with is the succulent and the lemon licorice (the irony here is how easy these plants are to care for).

Going Wild!
I'm most amazed by the pot of wild flowers. It is overflowing and while I know I need to be pulling some up I have no idea what to pull! Thankfully the pot is deep enough that the plants will thrive. Our sunflower has shot up to about two and half feet, it is huge! And the marigolds are making a tiny bush in their pot.


Found a Morning Glory peeking this morn
Our morning glories and moon flowers are slowly winding their way around the railings and columns of the house. I can't wait until they bloom. It's going to look amazing! The pots on the ledge hold two different types of zinnias and there are ornamental poppies and something else planted below the morning glories and moon flowers. While only the marigolds are in bloom I do love all of the green outside in our little garden. Especially the lamb's ear, I remember petting that plant at my grandparents' house when I was little - it's so soft!


We've been dabbling in floral arrangements this month in honor of all our cool plants outside. We found a milk jug vase on sale at the craft store and all of the beautiful silk blooms were calling to me. We have a fun and fresh spring arrangement sitting on the picnic table outside.


Inside in a glassworks vase my father made is a funky woodland inspired arrangement. I must say that florals is a fun hobby to have but boy are silk flowers expensive! I just couldn't wait for the real thing to bloom tho!


On a more crafty note, we are working on some crochet bags that are inspired by 1930s and 40s clutches and wooden handles. More on those lovelies at a later date.

Cheers,
Artful Anthropology